my header links

| Home | Preschool Lesson Plans | Educator Forums | Preschool Lesson Plan Directory |Advertise on 123child.com | |

Monday, November 29, 2010

Holiday Projects I want to try: The to do list

I posted a link about using tissue paper and mason jars to create Halloween Jack-o-Lanterns. I loved them. I have been thinking I want to try something similar to that but with a Christmas theme. Maybe a tree with star stickers, Santa, a candy cane, or just some red and green paper. So I looked online to see if anyone else had done something like this. Of coarse I came across a ton of cool crafts. Here are some of my favorites:

Glittery Santa Belly Jar Crafts by Amanda

These Santa jars are just too cute and I love glitter, so I think this is going to be a fun project.  I'm still thinking I want to put lights inside, so I might modify this to use the tissue paper and then add a thick ribbon for the belt with a gold buckle from the craft store.

It is a very advanced project for little ones.  That is why I am thinking of using the tissue paper instead.  It would be much easier.  Still it is super cute!!!!


Easy Santa's Belly Ornament Crafts by Amanda


And these ornaments are just as cute.  They look very easy to make, but again, not for the little ones:(  


Jumbo Craft Stick Snowman Craft by kidsactivities.net


Isn't this so adorable.  And I'm thinking it shouldn't be too difficult for preschool children.  It would make a great wall hanging, door hanging or ornament for the tree.  And I just bought googly eyes from the dollar store too!


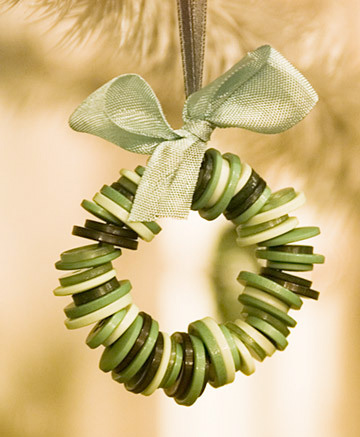
Button Wreath by Factory Direct Crafts

I'm loving these.  I'm thinking that my toddler can do something very similar with pipe cleaners and buttons.  Maybe?  But where does one get a ton of buttons and not pay a lot for them?  They are pretty costly at Joanns.

Wednesday, November 24, 2010

Christmas preschool lesson plans - Activity Idea Place

Christmas themed preschool lesson plans. Arts and crafts, games, math, science, group time activities, songs and snack ideas.

Books From Amazon.com
<*>The Sweet Smell of Chrismas
<*>Corgiville Christmas
<*>The Polar Express
<*>Toot & Puddle
<*>Snowmen at Christmas
<*>If You Take a Mouse to the Movies
<*>Olivia's Christmas
<*>Froggy's Best Christmas
<*>Legend of the Candy Cane


Art Activities


Hand Print Wreath
Trace each child's hands several times onto a piece of green paper. Have the children cut out these hand shapes. Supply each child with a paper plate and show them how to cut out the center of the plate. Have the children glue their green hands shapes onto the plate to make a wreath. You could also have them use a paper hole punch on red paper and glue the holes on for holly.

Cookie Cutter Painting
Put a small amount of tempera paint in a large shallow container. (A pie tin works well) Show your child how to dip the cookie cutter in the paint and press onto a piece of paper to create a print. You can make holiday pictures or greeting cards by using holiday cookie cutters and colored paper.

Candy Canes
Draw or trace a candy cane shape onto a white piece of paper. Then have the children cut or tear red strips or paper to place on the candy cane. Have the children glue the red pieces of paper onto their candy cane as the stripes. After the glue has dried, the child (or an adult) can cut out the candy cane shape.

Fingerprint Tree
Either have the children cut out their own tree or make one for them. Then let them use a non-toxic stamp pad to put fingerprints (Christmas Ornaments and lights) on the tree.

Cookie Cutter Matching
Put a small amount of tempera paint in a large shallow container. (A pie tin works well) Dip the cookie cutter in the paint and press onto a piece of paper to create a print. Place a few different Christmas cookie cutter shapes onto one piece of paper. After the paint has dried, you can use this as a matching activity. The child should match the actual cookie cutter to the print on the paper.

Santa's Reindeer
Trace each child's hands and one foot onto a piece of brown paper. Then have the child cut out these hands and their foot. The foot will be the reindeer's head, the heel being the nose, and the hands will be the antlers. Have the child glue the antlers onto the head, along with a red circle for the nose and blue circles for the eyes.

Santa's Reindeer 2
Paint the child's foot brown, but not the toes. Press the foot firmly onto a piece of white paper. Clean the child's foot with soap and water. Paint the child's hands brown, then have them press their hands firmly onto the paper near the top of where there foot was. Clean the child's hands with soap and water. Dry completely. Paint two of the child's fingers blue and one thumb red. Have the child press their fingers and thumb firmly onto a separate piece of white paper. The two blue fingers will be the eyes, and the red thumb will be the nose. After the paint dries, have the child cut out their finger and thumb prints and glue them onto their reindeer.

Christmas Stars
Cut out many different star shapes. Have the child glue the stars onto a piece of dark blue paper to represent the night sky.

Popcorn Garland
Make popcorn. Let it cool. Supply the children with a piece of yarn and a child safe needle (plastic and big) Have the children thread the popcorn onto the yarn to make garland.

Fingerprint Tree
Either have the children cut out their own tree or make one for them. Then let them use a non-toxic stamp pad to put fingerprints (Christmas Ornaments and lights) on the tree.

Christmas Ornaments
Decorate canning lids with string, ribbon, sequins, lace, and odds and ends. Glue a pipe cleaner to the back and hang on your tree.

Christmas Ornaments II
Have the children decorate really Christmas ornaments with string, ribbons, lace, sequins and odds and end. Allow to dry and send home for a great gift.

Bingo Dabber Art
For younger children, draw a Christmas Tree, and have the children decorate the tree with bingo dabbers.

Creative Cards
Fold a piece of construction paper in half. Provide children with a variety of materials, wrapping paper, paper, glitter, ribbons, bows, and let them make a holiday card for someone special.

Pine Cones
Collect pines cones or ask your parents to bring in some. Tie a ribbon around the top of the pine cone. Have the children apply glitter glue to them. Use them on a tree for decoration.

Christmas Place mats
Supply each child with a piece of paper. Allow the children to draw a Christmas object, such as a tree or Santa. You may provide stencils for this, or have the children draw on their own. Laminate the place mat for longer use.

Christmas Place mats II
Supply each child with 1/2 a piece of red paper. Have them tear the paper. Supply the children with green paper, and ask the children to glue their red torn pieces of paper onto their green piece of paper. Laminate the place mat for longer use.

Christmas Place mats III
Trace a Christmas shape onto a piece of paper. Have the child cut out the shape. Then glue the shape onto another piece of paper. Then have the children outline the shape with glue and add gold glitter. Laminate the place mat for longer use.

Christmas Color Finger Paints
Supply the children with red and green non toxic finger paint and white paper and have them make a picture.

Santa's Reindeer
Trace each child's hands onto a piece of brown paper. Then have the child cut out these hands. Supply each child with a paper plate and ask the children to draw a reindeer face on the paper and use their hands for antlers.

Hand Wreath
Trace each child's hands several times onto a piece of green paper. Have the children cut out these hand shapes. Supply each child with a paper plate and show them how to cut out the center of the plate. Have the children glue their green hands shapes onto the plate to make a wreath. You could also have them use a paper hole punch on red paper and glue the holes on for holly.

Cookie Cutter Painting
Put a small amount of tempera paint in a large shallow container. (A pie tin works well) Show your child how to dip the cookie cutter in the paint and press onto a piece of paper to create a print. You can make holiday pictures or greeting cards by using holiday cookie cutters, and colored paper.

Pine Branch Painting
Supply the children with a pine branch, with pine needles on it, instead of a paint brush. You could use red and green for a holiday picture, or whatever colors they wish.

Paper Plate Santa
Have your child draw a face on a paper plate, and glue on red triangle for Santa's Hat. Use a cotton balls on his hat and for his beard. Or cut out holes for eyes, and mouth, and punch two holes to make a mask.

Stockings
Help your child make a homemade stocking for the fireplace. Take a clean, hole free sock (red, green, white) and let your child decorate it with ribbons, bows, lace and whatever else you can think of.

Stocking II
Most advanced:
They may draw their own stocking shape onto a piece of paper and cut it out on their own. Then have them decorate it with markers, crayons, paint, sequins, glitter, ribbons, bows, lace... whatever you can come up with.
Moderate:
You draw the stocking shape onto a piece of paper and the children cut it out on their own. Then have them decorate it.
Simple:
You draw the stocking shape onto a piece of paper and the cut it out for them. Then have them decorate it.
Very Simple:
You draw the stocking shape onto a piece of paper and the cut it out for them. Then have them decorate it with Christmas stickers.

Stencil Art
Provide the children with stencils to trace. They may use markers, glitter, paint, crayons.. etc to decorate the shapes.

Sticker Art
For a very simple art project, supply the children with a piece of paper and stickers. For younger children this provides an excellent fine motor activity.

Candy Canes
This activity can be set up for all ages.
Most advanced:
They may draw their own candy can shape onto a white piece of paper and cut it out on their own. Then have them paint on the red stripes, or they may use red crayons or markers.
Little advanced:
You draw the candy can shape onto a white piece of paper and the children cut it out on their own. Then have them paint on the red stripes, or they may use red crayons or markers.
Moderate:
You draw the candy can shape onto a white piece of paper and the children cut it out on their own. Draw lines where the stripes should be. Then have them paint on the red stripes, or they may use red crayons or markers.
Simple:
You draw the candy can shape onto a white piece of paper and the cut it out for them. Draw lines where the stripes should be. Then have them paint on the red stripes, or they may use red crayons or markers.
Very Simple:
You draw the candy can shape onto a white piece of finger paint paper and the cut it out for them. Place masking tape where the stripes will be. Then have them paint on the red stripes, or they may use red crayons or markers. When the project is dry remove the tape. This way young toddlers can paint the whole thing without "making a mistake".

Another Candy Cane
They may draw their own candy can shape onto a white piece of paper and cut it out on their own. Then have the children cut red stripes to place on their paper. You can make this easier for young children by tracing, cutting, or using torn paper for the stripes.

Santa Hats
Cut out hat shapes for the children from red paper. For older children trace the shape and let them cut it out. Supply the children with cotton balls to glue around the bottom and one for the top.

What I want for Christmas Collage
Supply the children with plenty of toy magazines and ads. Invite the children to cut out what they would like for Christmas and have them glue the pictures onto a piece of paper for a collage.

Wrap it up
Let your child wrap a small box in tissue paper or gift wrap. Let them pretend to give it to someone.

Paint on Wet Paper
You can also use this as a science experiment. Explain diffusion, the spreading of the paint on the paper, through the water. Wet the paper and have the children paint on the paper with red and green paints.

All I want for Christmas- Bulletin Board Idea
Fold a piece of paper in half, to create a card. Have the card fold up. On the inside have the children cut out and paste things they would like for Christmas. Then have the children use wrapping paper for the outside. Use Christmas labels to identify each child's artwork.

Games, Math and Science

Christmas Star Sort
Supply the children with different size stars. Have the children sort the stars according to size.

Christmas Star Seriation
Supply the children with many stars with numbers on them. Have the children line up the numbers 1, 2, 3, etc.

Picture Matching
Find holiday stickers. Place 2 identical stickers on the left and right sides of an index card. Cut the index in half, cut in a jig-jag form. Use a highlighter to highlight the edges. Do this with many different stickers. Have the child match the stickers, and line up the two halves of the index card.

Lacing Cards
Cut colored poster board into a Christmas shape (tree, wreath, star) and punch holes around the edges. Them let your child lace yarn or a shoestring into the cards.

Stamping Patterns
Use Christmas Theme rubber stamps to create a simple pattern on the top half of a piece of paper. Ask your child to help you recreate the pattern on the bottom half of the paper. Tip: Start with one stamp, and have your child pick which stamp you used. Start slowly and work your way up to more complicated patterns.

Bean bag toss
Have your child toss bean bags into a box with wrapping paper on it. You can use masking tape to mark where the child should stand.

What scent is this?
Gather four or different objects with different scents, like Christmas Cookies, a Candy Cane, yams etc. Blindfold the child, then place the object close the the child's nose, and ask the child to smell it and try to identify what it is.

Count the Stripes
Make many different candy cane shapes with different different numbers of stripes. Have the children count the stripes on the candy canes. If you made candy cane art (above) then have each child count the stripes on their candy cane. You could ask the children who had the most, the least and make a chart of how many lines were on the candy canes. Which number of stripes did most people make?

Candy Cane Balance
Supply each child with a candy cane. Ask them to balance it on their head. then have the children walk from point A to point B. (Preset marks..) Whoever makes it across without dropping their cane wins.

Candy Cane Weighing
Supply the children with a balance and candy canes to experiment with.

Christmas Shape Match Up
There are many ways to set this up depending on the skill level or the particular skill you wish to work on. Try these different set ups: (Use your own Christmas Shapes... wreath, tree, star, bell, ornament... etc)
---Cut out Christmas Shapes from different colors of paper. Give each child one Christmas Shape. Ask the children to find one person with the same color Christmas Shape.
---Cut out Christmas Shapes from different colors of paper. Cut the Christmas Shapes in half using a puzzle type cut, like zig zag or interlocking pieces. Give each child one half of a Christmas Shape, and ask them to find the person with the other half.
Or Give the children two pieces and have the children make a circle, with one child that has one match on one side and the other match on the other side. You may end up with 2 or more circles depending on how the Christmas Shape pieces are distributed.
---Cut out Christmas Shapes from one color of paper. Cut the Christmas Shapes in half using a puzzle type cut, like zig zag or interlocking pieces. Give each child one half of a Christmas Shape, and ask them to find the person with the other half.
Or Give the children two pieces and have the children make a circle, with one child that has one match on one side and the other match on the other side. You may end up with 2 or more circles depending on how the Christmas Shape pieces are distributed.
---Cut the Christmas Shapes from one color of paper. Label one set of Christmas Shapes with numbers, i.e. if you have 20 children, label the Christmas Shapes with the numbers one to ten. The other half, draw one dot on one, two on another, and so on until ten. Give each child one Christmas Shape and have them find the child with their match.
---Cut the Christmas Shapes from one color of paper. Place matching stickers on two Christmas Shapes. Give each child one Christmas Shape and have them find the child with their match.
---Cut the Christmas Shapes from one color of paper. Cut the Christmas Shapes in half using a puzzle type cut, like zig zag or interlocking pieces. Place matching stickers on each half of a Christmas Shape. Give each child one Christmas Shape half and have them find the child with their match.
---Place matching Christmas stickers on separate index cards. Give each child a card and ask them to find the child with their match.
---Try all the above, but in a file folder format. Glue one part of the Christmas Shape to the file folder and laminate it's match.

Christmas Tree Hop
Cut out large Christmas Tree shapes from colored paper. Laminate them and cut them out. Place them on the floor and ask the children to hop from one tree to another. These may also be used at seat markers for group time.

Where is your Gift?
Played like "Doggie Doggie where's your bone?"
Have one child sit in the middle of the circle, and hide their eyes. Give another child a Small Gift to hide behind their back. Have all the other children put their hands behind their back. Chant the following song:
Santa, Santa
Where's your gift
You better wake up
and find it swift.
The child in the middle gets three guesses. Then the child who had the gift goes into the middle.

What time is it Santa?
This is a fun game to play outside. You can change the name to suit any theme.
The children all line up against a wall or fence.
And one child, (Santa) or the teacher faces away from the children, a good distance away from the children.
The children yell, what time is it "Santa",
Santa answers 1 o'clock, and the children all take one step toward Santa.
The children yell again, what time is it "Santa",
Santa answers (fill in the blank) o'clock, and the children all take same number of step toward Santa.
This continues until all the children are very close to Santa, then Santa will answer it's midnight, and chases the children back to the fence or wall that they started at. The first person Santa touches will be the new Santa.

Gift Hide and Seek
Have all the children hide their eyes while you "hide" a gift in the room. (It should be placed in plain view) Tell the children to find the gift, but not touch it. Once they spot it they should sit back down in their spot. The first one to sit down again will get to hide the gift.

Gift Hide and Seek
Play the game the same as above, except hide the gift. Then tell the chidlren individually whether they are "hot" or "cold" to the relation of the gift. Allow the other children to have a change to hide the gift, and tell children whether they are "hot or cold". It may be a good idea to discuss the meaning of hot and cold before you play this game.

Christmas Shape Fishing Game
Tie 3 feet of string to a wooden spoon. Attach a magnet to the end of the string. Cut and laminate many different colored, and Christmas Shapes from construction paper (not too big though). Attach a paper clip to each Christmas Shape. Spread the Christmas Shapes on the floor and let your child try to catch the Christmas Shape. Have them try to catch the star or the biggest tree. For a twist, label the Christmas Shapes with letters or numbers.

Christmas Shaped Games
The following games require you to cut out many different Christmas Shapes from construction paper. You may choose to laminate these Christmas Shapes so they last longer.

Tree Sizing
Cut out many different sized trees. Ask the children to line up the trees from largest to smallest.

Ornament Sizing:
Cut out many different sized Ornaments. Ask the children to line up the Ornaments from largest to smallest.

Star Sizing:
Cut out many different sized stars. Ask the children to line up the stars from largest to smallest.

Tree, Ornament or Star Numbers
Cut out ten shapes. Number them one to ten. Ask the children to line up the shapes from one to ten.

Ornament Colors
Ask the children to sort the ornaments by color.

Tree, Ornament or Star Sort:
Supply the children with plenty of trees, ornaments and stars of many sizes and colors. Ask the children to sort the shapes by size, color or type.

Play "Who stole the Cookie?"
Class: Who stole the cookie from the cookie jar?
Teacher: (Ann) stole the cookie from the cookie jar?
Ann: Who me?
Class: Yes you!
Ann: Couldn't be!
Class: Then who?
Ann: (Tommy) stole the cookie from the cookie jar?
Tommy: Who me?
Class: Yes you!
Tommy: Couldn't be!
Class: Then who?

Christmas Cookbook
This activity is more than worth it's time in laughs. I have done it two years in a row and everyone laughs. Take the children aside one by one and ask them, "What is your favorite Christmas food?" Then ask them "How do you make that?" Write down word for word their responses. You may find it helpful to video tape the responses so you can get it all down. Then compile all of the responses in your classroom recipe book. You may make copies for the parents to take home or make one copy so that the parents may enjoy it. If you do the video, you may want to just show the video at a Christmas party for the parents.

He'll be coming down the Chimney
Sung to "She'll be coming around the mountain"
He'll be coming down the chimney when he comes,
He'll be coming down the chimney,
He'll be coming down the chimney when he comes.

He'll be bringing lots of presents when he comes,
He'll be bringing lots of presents,
He'll be bringing lots of presents when he comes.

He'll be driving nine reindeer when he comes,
He'll be driving nine reindeer,
He'll be driving nine reindeer when he comes.

I Know a Man Named Santa
written by chicky
Sung to "The More We Get Together"
I know a man named Santa
Named Santa, Named Santa
He has nine reindeer

He travels round the world
Round the world, round the world
He travels round the world
To delivers his gifts.

He comes down the chimney
The chimney, the chimney
He comes down the chimney
To deliver the gifts.

Santa Song
written by chicky
Sung to "Frere Jacques"
When I'm sleeping
When I'm sleeping
He will come
He will come
He will eat the cookies
And drink the milk
And drink the milk

Friday, November 19, 2010

Christmas Gifts Kids Can Make

With Thanksgiving less than a week away, I figured I would tackle the topic:  What should I have the preschool  children make this year to give to their parents?

Snowman Ornaments
Submitted by GreatestResource Child Care
Paint the child's hand white (use acrylic paint), then have them press their hand onto a blue Christmas ornament with their palm on the bottom of the ornament.  Allow the paint to dry.  Add details with acrylic paint, either with a paint brush or paint pens.

Salt Dough Ornaments
Ingredients
2 cups flour
1 cup salt
1 cup water
Food coloring (optional for colored ornaments)

Mix salt and flour.  Add half the water to the dry ingredients.  Mix, then slowly add the remaining water.  Kneed until the dough is smooth.  (about 10 minutes)  For flat dough ornaments roll out the dough on baking paper.  Use cookie cutters, or a butter knife to create your shape, then dust with flour and add details with a toothpick or butter knife.

You can also make different shapes like wreaths or Christmas Balls with your hands, these do take longer to bake.

Before you bake use a straw to make a hole so you can hang your ornament.

Bake at 325 degrees.  Baking time varies based on the thickness of the ornament (about 90 minutes or until dry)

To preserve your ornaments coat with a layer of acrylic varnish after the ornaments are completely dry and cool.

Picture Frame
You will need six popsicle sticks, tacky glue, buttons, two small magnets, construction paper and a picture of the child. Then you make a frame with four popsicle sticks. Lay two stick parallel to one another (stick 1 and 2) then complete the from with sticks 3 and 4. Then to make the picture stay in you will need to add stick 5 and 6 on the top and bottom of the frame. So you have sticks 3 and 4 (the sides) with a stick on the top in front, top in back, bottom in front and bottom in back. Follow? Connect these sticks with glue. When dry have the children decorate these sticks with paint. Cut a piece of paper to fit the back of the frame. Glue that on. Cut the picture to fit in the frame, and insert the picture. Then glue the magnets at the top and bottom of the back of the frame. Viola.. an awesome gift.
Variations:
Glue red and green buttons onto the frame
Glue Christmas paper pieces onto the sticks
apply Christmas stickers to the frame
Apply glitter to the frame with glue
Glue Christmas foam shapes to the frame (see left)
Use Christmas shape punch to create shapes to glue to the frame.
glue red and green puzzle pieces to the frame
glue red and green beads to the frame
glue on red  and green pom poms
decorate with bling


Popsicle Stick Snowflake
Have each child paint four pop-sickle sticks white.  (Use a quality acrylic paint) An adult should use hot glue four pop-sickle sticks together to form the shape of a snowflake.   Then the child can decorate the pop-sickle sticks with white buttons, glitter, pom-poms or other materials.

Decorate an Ornament
Obtain clear ornaments and have the children paint with quality acrylic paints.
The children can also glue bling, stickers and other items to the ornaments.  You can also get the kind that you can put things inside the ball.  The children can put tinsel and other items inside the ornament.

Decorate a Pot
Have the children decorate a terra cotta pot with acrylic paints.  They can add glitter. You can also have the children pick out some seeds to place in the pot.

Check out this handprint calendar from Little Giraffes.


Cookies in a jar

Materials Needed
Quart Size Canning Jars with Lids
Scrap Fabric
Ribbon
Glue
Paper

Make sure you clean the canning jars and lids and allow to dry before you begin this activity.

Have the children add the following ingredients into their jar in the order they are listed.  You can use a funnel to make this easier.  Have the children pack down each layer.  Fill the jar to the top with semi-sweet chocolate chips.

2 cups flour
1 tsp salt
1 tsp baking soda
3/4 cup brown sugar
3/4 cup white sugar
* chocolate chips

Create a gift tag with the following information:
Christmas Chocolate Chip Cookies

1 cup softened butter
1 egg
1 tsp vanilla

Preheat oven to 350 degrees.  Mix the butter, egg and vanilla until thoroughly blended.  Add the dry ingredients from the jar to the mix.  Stir until completely blended.  Drop teaspoon sized balls of batter onto a cookie sheet about 2 inches apart.  Bake 8 - 10 minutes or until lightly browned.

I suggest that you print the directions on card stock and have the children decorate the side without the directions.

Love Box
Have the children decorate a white box however they like.  They can use paint, crayons, markers, glitter, poms, wrapping paper or other items.  Tie a ribbon around the box and attach the following poem:

This is a very special gift
That you can never see.
The reason it's so special is,
It's just for you from me.
Whenever you are happy,
or even feeling blue.
You only have to hold
this gift and know
I think of you.

You never can unwrap it
Please leave the ribbon tied.
Just hold the box close
to your heart,
It's filled with love inside.

Stepping Stone
Have the children create a stepping stone for a loved one.  They can use their hand print and decorate it with jewels, glitter and other items.

Candle Holders
Purchase glass candle holders.  Have the children decorate the holders with festive acrylic paints and glitter.  Allow to dry completely.  Add a candle for the perfect gift.

Bookmarks
Cut shapes for the bookmark from card stock.  Have the children decorate the bookmarks with paint, markers, crayons, wrapping paper or other items.

Wednesday, November 17, 2010

"Put Me in the Zoo" and Fruit Loops

"Put Me in the Zoo" and Fruit Loops


 I sat with my daughter this morning eating Fruit Loops and as she took each one I told her what color she had.  She can say some of the colors, like blue, green and purple.  She toddled off and grabbed one of her favorite books, "Put Me in the Zoo".  I like the book because it also helps teach about colors.  She likes the part "Out you go, out out with you!"  She points her finger and says "out, out".  It is really cute.  Sometimes when we read, she will point to objects and I will tell her what they are.  But I'm stumped... what is that thing?  A bear? 


So we are sitting there eating Fruit Loops and reading.  My darling daughter takes a blue Fruit Loop and placed it on the bear who now had blue spots.  Whoa!!! Very cool.  I then went through the small bowl of cereal to find more blue Fruit Loops and placed them on the page.  We repeated the process with the green and orange page.  It was a fun activity.  She thought is was so great, she went to get "Mr. Brown can Moo" and put some Fruit Loops in that book too.  Oh well, it was cute and we are working on colors.

It's been a while since I did a book themed lesson plan.  But I had so many ideas rolling around in my head, I just have to get them written down.

So start by reading the book.  I have the board book, so that is the version I'm writing the lesson for.  I'm pretty sure that it will translate to the regular version as well.

Try these pages:
Zoo Animals
Blue
Colors
Green
Orange
Red
Purple

Preschool Art Ideas

Note: buttons are used in some of these activities.  Buttons are a choking hazard and should not be used with children under the age of three, or children who tend to put things in their mouths.

Ideas to make spots children can:
  • use bingo dabbers
  • dip a pencil eraser in paint or ink pad and press onto a piece of paper
  • dip fingers into paint or an ink pad and press onto paper
  • glue Fruit Loops onto paper
  • use circle shaped item dipped into paint or ink pad and pressed onto paper
  • use the holes from a hole punch
  • use circles from a circle punch
  • buttons or button prints
  • cut a potato in half and use it to make prints
Make spots on:
  • yellow paper
  • yellow paper cut out like the bear
  • white paper
  • use only one color (red, blue, green, orange or violet) on yellow paper


Spotted Necklace
Supply the children with fruit loops and yarn to make a wonderful necklace they can eat.


How Much is a Handful Art
Have the children trace their hand onto a piece of paper.  Have the children grab a handful of Fruit Loops and  count them.  Then glue the Fruit Loops onto their hand shape.

How Much is a Handful Art/Graph
Have the children trace their hand onto a piece of paper.  Have the children grab a handful of Fruit Loops and  count them.  Then glue the Fruit Loops in rows according to color.  Count each color and write the number below the row.  Write the total number of Fruit Loops in the hand shape.


Science, Games and Math

Spot (Fruit Loop) Sort
The children can use a muffin tin to sort Fruit Loops by color.  

Spot (Fruit Loop) Estimation
Have the children estimate how many Fruit Loops they can grab with one hand.  Then have them grab a handful of Fruit Loops and count them.


Spot (Button) Sort
Have the children sort buttons by size or color.

Spot Game
Supply the children with five baskets and buttons. Place a piece of paper with a number on it in each basket and instruct the children to place that many buttons (spots) in the basket. If the basket says "5" place five buttons in the basket.

Spot Numbers
Write the numbers one through six on small post it notes and place in the bottom of a big muffin tin.  Have the children put one spot (button or Fruit Loop) in the one hole, two in the two and so on.

Spot (Button) Balance
Supply the children with plastic buttons and a balance to play with.

Spots (Buttons) in the Sand and Water Table
Supply the children with hundreds of buttons in the sand and water table.

What is in the Egg?
Place different number of buttons inside plastic eggs. Have the children shake the eggs and try to guess how many are inside. Open up the eggs and count.


Spot (Button) Toss
Supply the children with plastic buttons and an basket. Place a piece of masking tape on the floor for a throw line. The distance from the basket to the line should vary with abilities. Have the children throw the buttons into the basket.

Spot (Button) Jar
For older children. Fill a small jar with buttons. Ask each child to guess how many buttons are in the jar. For younger children, limit the number of buttons to less than ten. Record each child's guess. Count the buttons.

Spot (Button) Jar for School Agers
Provide three identical jars with pre-counted buttons of 20, 30, and 40. Label these jars 20, 30 and 40. Place 20 to 40 buttons in a fourth identical jar. Allow the children to examine all four jars before they guess. Record the children's approximations. Count the buttons.


Musical Spots
Cut out large spot shapes from colored paper. Laminate them and cut them out. Place them on the floor. Play music and have the children walk around the room. When the music stops, each child needs to find an spot to stand on. You may play this a variety of different ways
More spots than children, take away no spots or children. This is great for the younger ones.
One spot per child to begin, take away one spot each time, but children may share spots, until all children are on one spot at the end.

Spot Hop
Cut out large spot shapes from colored paper. Laminate them and cut them out. Place them on the floor.  Have the children hop form one spot to the next.

Pass the Spot
Played like hot potato... have the children sit in a circle and pass plastic spot around the circle when music is playing, when the music stops the child holding the spot sits in the middle or the "spot pot" until the music stops again and the next child replaces the first. You may also chant "Spot, Spot, 1, 2, 3, 4, 5, 6, 7, 8, 9, 10" and the child who has the spot on 10 is in the "spot pot."


Spot-Shaped Snacks
For a snack, use any of the following for a spot shape:
Sliced Bananas
Sliced Oranges
Sliced Cucumbers
Sliced Egg
Sliced hot dogs or sausage
Round Crackers

Preschool Songs and Poems


Ten Little Spots
sung to Ten little Indians
by Amber Louchart
One little, two little, three little spots,
Four little, five little, six little spots,
Seven little, eight little, nine little spots,
Ten little spots on the bear.

Put me in the Zoo Poem
by Amber Louchart
This animal is the craziest thing,
His spots are red, then their green,
If you want to see something new,
wait and you will see they are blue,
Violet and orange, what a treat,
This animal is really neat.

Sunday, November 14, 2010

Thanksgiving Foods

Thanksgiving Food Collage
Supply the children with the circulars for various grocery stores.  Have them cut out their favorite Thanksgiving foods and glue them onto a paper plate or a piece of paper for a place mat.

Chocolate Pudding Finger Paint
Mix instant chocolate pudding according to the directions and paint on wax paper. Great for children who like to eat their art.

Thanksgiving Foods
Ask the children what their favorite thanksgiving foods are.  You can post them as class favorites, or you can list each child's favorites.

Create a Graph
Select a few Thanksgiving foods to make and have the children try the foods.  Then they should vote on which they like the best.  Create a graph and talk about the results.

Thanksgiving Cookbook
This activity is more than worth it's time in laughs. I have done it two years in a row and everyone laughs. Take the children aside one by one and ask them, "What is your favorite Thanksgiving food?" Then ask them "How do you make that?" Write down word for word their responses. You may find it helpful to videotape the responses so you can get it all down. Then compile all of the responses in your classroom recipe book. You may make copies for the parents to take home or make one copy so that the parents may enjoy it. If you do the video, you may want to just show the video at a Thanksgiving party for the parents.
One of my favorite responses:
Thanksgiving Turkey by Emily
First you get in the car and go to the farm and get a turkey. You pick a big one.

Thanksgiving Day
Pretend to have a feast just like Thanksgiving. Pretend to eat all the foods that you would have at Thanksgiving.

Make Butter
You need:
heavy whipping cream
dash of salt
baby food jars (one for each student)

Place a small amount of heavy whipping cream and a dash of salt into each baby food jar. Place a lid on each jar. Have the children shake the jar until cream turns to butter. You can serve the butter on crackers or bread.

Thankful for Friends Fruit Salad
Have each child in the classroom bring in a bowl of their favorite fruit.  The fruit should be washed and cut before serving.  Place each fruit in a small bowl with a serving spoon.  Have the children create their own fruit salad by taking a little of their favorite fruits and placing it in their own bowl.

Pumpkin Pies
You need:
silver muffin papers
instant vanilla pudding (or pre-made)
vanilla wafers
whipped cream (optional).

Prepare the instant pudding according to the directions.  Add some pumpkin spice to the pudding. distribute one muffin paper to each child. Have the children place one vanilla wafer in the muffin paper. Have the children spoon some pumpkin flavored vanilla pudding on top of the vanilla wafer. Have the children crush a second vanilla wafer and sprinkle on top of the pudding. Add whipped cream.

Noodle Coloring
To color noodles or rice for art and other projects, use 1/4 cup rubbing alcohol for every cup of noodles. Add 1/4 cup rubbing alcohol to a 16 oz cup. Add a few drops of food coloring to the alcohol (about 10 will do, depending on how bright you want the noodles or rice). Place one cup of uncooked noodles or rice into the mixture and make sure it is fully coated. Spoon the noodles or rice onto a paper towel on a counter or table to dry. After dry, the children can use for projects. Repeat with other colors.

Check out all of our noodle ideas here: Noodles

Sand and Water Table Ideas:
add colored rice or noodles with measuring cups and other tools
add corn meal
add dried corn
add seeds or bird feed

Sensory Table
Provide the children with pumpkins, gourds, sweet potatoes, apples, carrots, and other food items to explore with a magnifying glass.  Talk about how these foods grow.

Sticker Games

Place 2 identical stickers on the left and right sides of an index card. Cut the index in half, cut in a jig-jag form. Use a highlighter to highlight the edges. Do this with many different stickers. Have the child match the stickers, and line up the two halves of the index card.

Place pairs of identical stickers on the left and right sides of an index card.  Cut the index card in half using a straight cut.  Use the cards to play memory.

Place each sticker on an index card that has been cut in half.  Have the children sort the cards into groups.  Ask the children how they sorted the cards.

Wednesday, November 10, 2010

Thanksgiving Wreath

I saw this awesome idea for a wreath on Chica and Jo. I figured I would try it out and give one to my mother in law for her birthday and one for my mom as an early birthday gift.


So I went out and bought supplies:
A 12 inch wire wreath (which JoAnn's said they didn't have in the store, but they do)
Clothespins (about 60)
Acrylic Paint (orange and yellow)
Acrylic Pen (black, fine tip)
Wooden Heart shape
Brown Ribbon
Paint Brush
Hot glue gun (not shown)

I let my darling daughter help me paint the clothespins and the heart with the orange and yellow acrylic paint. She had fun until I ran off to find the camera, then she was done painting.

I let the clothespins and the heart dry overnight.

After the clothespins and heart dried, I attached the clothespins to the wreath. I tried to fit on as many as I could. Which ended up being about nine per section. Some sections fit ten.

At first I just clipped them to the edge, but then when I tipped it up the top ones all fell, so I slipped the ends between the outermost edge.


I then wrote "I'm thankful for:" on the heart with the acrylic black pen.

Finally, I used a hot glue got and attached the ribbon to the wire frame and the heart. I also made a hook for the wreath with the brown ribbon.

The idea is that everyone will write their name on the small part of the clothespin and what they are thankful for on the larger part.

Thanksgiving - Potatoes

Potato Preschool Lesson Plans

Potato Prints
Cut a large potato in half. You will need a cookie cutter that will fit on the potato half. Press the cookie cutter into the flat side of the potato. Then, using a knife, cut the potato around the outside of the cookie cutter, leaving a shaped potato stamp. Supply the children with the potato stamps, different colored paints, and paper. Have the children dip the potatoes in the paint and press them firmly onto the paper. If the potatoes are not cut evenly the shapes will not appear clearly.

Potato Prints 2
Cut a large potato in half. You will need a cookie cutter that will fit on the potato half. Press the cookie cutter into the flat side of the potato. Then, using a knife, cut the potato around the INSIDE of the cookie cutter, leaving a shaped potato stamp. Supply the children with the potato stamps, different colored paints, and paper. Have the children dip the potatoes in the paint and press them firmly onto the paper. If the potatoes are not cut evenly the shapes will not appear clearly.

Potato Prints
Cut a large potato in half. Supply the children with the potato stamps, different colored paints, and paper. Have the children dip the potatoes in the paint and press them firmly onto the paper. If the potatoes are not cut evenly the shapes will not appear clearly.


Oxo Good Grips Smooth Potato Masher
Oxo Good Grips Wire Potato Masher


Masher Prints
Supply the children with a variety of potato mashers. Have the children dip the mashers in paint, then press onto a piece of paper.
Potato Rubbing 
Cut out oval shapes from sandpaper, textured paper, card stock or lace doilies.  Tape the shapes to the table, then place a piece of paper over the shape.  Have the children rub a crayon over the shape.


Mr. Potato Head Painting
The children can dip the pieces of a Mr Potato head in paint and press onto a piece of paper.  They can also use pieces like a paint brush.

Mr. Potato Head Sorting
If you have many pieces for your Mr. Potato head, you can have the children sort the pieces by color, type or other criteria.

Mr Potato Head Play
Children can use the figures in the dramatic play area.

Visit a potato farm.

Potato Lacing Cards
Cut out several potato shapes from thick card stock.  You can laminate these to make them last longer.  Punch holes around the edges.  Have the children lace a shoe lace around the edges of the potato shape.

Food and snack ideas:
potato latkes
potato pancakes
potato soup
mashed
french fries
hash browns
baked
tater tots
scalloped

Taste Test
Make a few different potato dishes.  Have the children taste each of the potato dishes.  They can then vote on which kind of potato they like the best and you can graph the results.

One Potato Chant
One potato, two potato, three potato, four.
Five potato, six potato, seven potato, more.

Potato Plants
Help the children insert 3 or 4 toothpicks around the middle of a potato horizontally. Balance the toothpicks on the rim of a glass jar.  Add water to the jar so that it covers the bottom of the potato.  Check the water level often and refill as necessary so the water covers the bottom of the potato.  After about 2 weeks the potato will sprout new spuds.

Potato Shaped Activities
Cut out several potato shapes from construction paper.  Use these shapes for the following activities.
- cut the shapes from different colors and have the children sort the potatoes by color
- cut out different sized potatoes and have the children sort the potatoes by size
- cut the shapes from card stock then use contact paper to attach them to the floor, have the children hop from one shape to another
- cut the shapes from card stock and use them for seat markers
- cut the shapes from card stock then use contact paper to attach them to the floor in a circle.  Play musical potatoes.  Have the children walk around the potatoes while music plays.  When the music stops, each child should find a potato to stand on.  There should be more potato shapes than children.
- number the shapes 1 to 6 and have the children place the potatoes in order

Pretend Potato Toss
Use a brown bean bag (or a pair of rolled up brown socks) as a pretend potato.  Have the children try to toss the bean bag into a laundry basket.

Potato Sack Race
Have a potato sack race, or just have the children pretend they are in a sack and have a hop race.

Potato Fun
Let a potato sit out in the class and observe what happens.


Hot Potato
Play hot potato with the children. Have the children sit in a circle. You can pick an object to be the potato or play with a real one. Sing "Hot Potato, Hot Potato, 1, 2, 3, 4, 5, 6, 7, 8, 9, 10." The child that has the potato on ten goes in the center of the circle, called the pot.


Hot Potato
Play hot potato with the children. Have the children sit in a circle. You can pick an object to be the potato or play with a real one. Chant  "Hot Potato, Hot Potato, Hot Potato Hot, Hot Potato, Hot Potato, Hot Potato Stop!" The child that has the potato when the cant gets to "stop" goes in the center of the circle, called the pot.


Hot Potato Parachute
Use a brown bean bags (or a pairs of rolled up brown socks) as a pretend potatoes.  Place the pretend potatoes on top of a parachute.  Have the children try to shake all the pretend potatoes off of the parachute.  Alternatively they can shake the parachute and try to keep them on the parachute. 

Videos From Sesame Street
South Potato
The Potato Song
One Potato

Youtube Videos
Hot Potato by the Wiggles
One Potato, Two Potato by Susan Salidor
Sesame Street - One potato, two potato